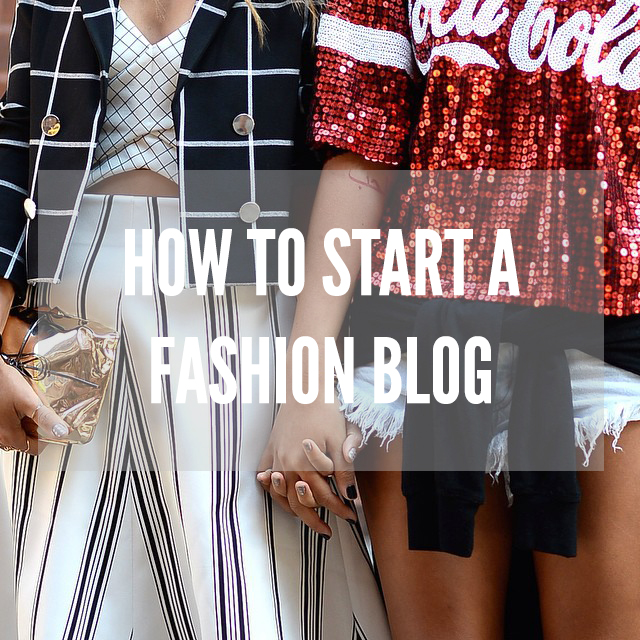
HOW TO START A FASHION BLOG

Rubber Floor backdrops for Photography uk

Many people harbour unfulfilled ambitions to start a blog, but finding the time can be tricky – sometimes we need a kick to get started. However, as Fashion Week rolls around again, there’s no better time to start a fashion blog. Wannabe bloggers will find plenty of inspiration on the catwalks this season, so all that remains to be conquered is the technical know-how…

Choosing a Hosting Service and a Domain Name

The first step to starting any blog is to choose a web hosting service. The biggest and most popular providers at the moment include Tumblr, Blogger and WordPress. Tumblr is ideal for image-heavy posts, Blogger is especially suited to internet novices and WordPress offers more options for customisation for the more web savvy user. Websites such as http://website.1and1.co.uk/how-to-build-a-website  can help with this process. After selecting a hosting service, the next stop is choosing a domain name.  A domain name or URL is how readers find a blog, so it should be memorable, and ideally bear some relation to what the blog is actually about.

Building a Brand

There are no required qualifications to become a blogger, and so fashion blogs are ten a penny. So what does a blogger need to do in order to stand out?  First off, they need to be good. It may sound obvious, but there are loads of bad blogs out there – one instant way a writer can stand out from the crowd is to ensure that their posts are well-written, interesting and free from spelling and grammatical errors, as well as making use of eye-catching photos and videos too. The second step to standing out is to build a brand.  Every new fashion blogger needs to find their niche, whether that’s street style photography backdrops in UK, trend prediction or simple style advice. It might not come right away, but once it does, a blogger is on their way to building their own unique brand and voice.

Reaching Out

Of course, no blog can be successful without readers, so the final step for fashion entrepreneurs is to find some fans.  Popular methods include linking the blog to a related Twitter account, starting a Facebook page for the blog and using SEO text and keywords to climb up the search results. Once a fashion blog has regular readers, there’s no limits to how what it can do.

Image: Tumblr.

7 STEPS TO LOOK GOOD AFTER A LONG HAUL FLIGHT

LOOKING GOOD AFTER A LONG HAUL FLIGHT

The air on a plane is notoriously super drying, thankfully our friends over at Hairtrade.com have devised a list of must-do’s for those of us “lucky enough” to be on a 8hr+ flight to hopefully sunnier climes.

1. Prepare your skin

Prep your skin for your up and coming flight by swapping your daily facial cleanser to a gentle exfoliating scrub.

It is important to keep your skin hydrated, and so exfoliating before your flight will get rid of the top layer of dead skin that prevents any moisturiser from absorbing into the skin.

2. Prevent flight hair syndrome

One of the telltale signs that you’ve been on a long flight is the deflated area in the back of your hair from leaning on a headrest.

Make sure you keep that section looking full throughout the flight by using an inflatable neck travel pillow.

Also, focus on getting more volume into your hair when blow drying before you leave.  Spritz a volumiser at the roots then, when your hair is fully dry, work some dry shampoo into them for extra body.

3. Spritz before moisturizing

It is proven that flying has a drying effect on your skin so it is important to make sure you keep your face hydrated. 

Moisturising lotion is more absorbent and retains better when your skin is wet. Pat a cool wet cloth across your face or spritz with water before applying your moisturiser.

Make sure you also apply some lip balm to your lips and drink plenty of water throughout the flight.

4.  Go Nuts

Eating nuts will not only keep you feeling full so you don’t reach for those processed goodies, but the Omega-3 acids in them will give you a glowing complexion.

5. Avoid blood shot eyes

A long haul flight can leave your eyes feeling tired and looking bloodshot.

Line the inner rim of your eyes with a peach eyeliner pencil to make your eyes look bright and combat tiredness.

Then load up with mascara, but make sure you skip the bottom lashes altogether. The mascara could run leaving dark circles and making you look tired rather than fresh.

6. Prepare for touch up

Prepare for a make-up touch-up once you land by carrying your essentials in your hand luggage.

Dab highlighter on your cheekbones and under your eyes for a quick brighten and carry powder to minimise shine.

Also brush your teeth before you land. You’ll be surprised how much more refreshed you’ll feel with clean teeth and fresh smelling breath.

7. Circulate

Sitting down for hours on end never did anyone any good. Get up and walk around for a while when the ‘fasten your seatbelt’ sign is off.

Blood circulation does wonders for reducing bloating and helping keep your skin rosy and awake.

Circulation is also important in making sure you’re eyes aren’t puffy and tired. Ask for an ice cube and a napkin to hold up to your eye for a minute or so and the swelling will go down.

HOW TO… AT HOME MANI/PEDI

I’ve been doing my own nails for most of my life, I worked in a boutique nail salon for a couple of years when I was younger and have mani/pedi/acrylic-ed my nails myself ever since. About 2 years ago I stopped the acrylic overlays due to my nails becoming extremely dry and brittle, since then I’ve given myself a mani/pedi every couple of weeks and my nails have come on leaps and bounds! Here’s a How To… to get your nails right, at home.

1. Remove any old nail polish using a nail polish remover that’s kind to your nails i.e. for brittle nails, soft nails, nourishing, etc.

2. Apply Orly Cutique to the cuticles, leaving it for 30-60 seconds

3. Push cuticles back using a cuticle pusher or an orange stick

4. Clip cuticles using cuticle clipper (you can use the curved scissors but I much prefer using the clippers, so much easier)

5. Shape the free edge of your nail, then rinse hands thoroughly

6. Apply a coat of Orly Top 2 Bottom to each nail

7. Apply two even coats of your desired colour to each nail, on this occasion I’m going to use Hidden Treasure from Topshop

8. Follow up with a coat of Orly Top 2 Bottom, then apply a coat of Orly In A Snap quick dry top coat to each nail

9. Marvel at your deliciously manicured nails!!!

Follow this routine every two weeks and you’ll have wonderful natural nails in no time!